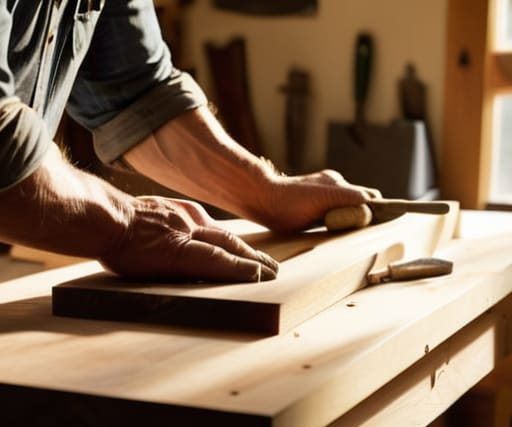
I was sitting in my favorite corner café this morning, sketching a quick floor plan on a paper napkin, when I looked up and saw a customer struggling with a wobbly, particle-board shelf that looked like it might collapse under the weight of a single paperback. It’s a frustrating cycle, isn’t it? We’ve been conditioned to think that building something durable requires a massive workshop or a degree in structural engineering, but that’s a myth. The real secret to how to build a bookshelf that lasts isn’t about owning the most expensive power tools; it’s about understanding the soul of the materials you choose and respecting the way gravity interacts with your design.
In this guide, I’m stripping away the fluff to give you a practical, no-nonsense roadmap to creating a piece of furniture that feels like a permanent part of your home’s architecture. We’re going to dive into selecting honest, sustainable woods, mastering the joinery that prevents sagging, and ensuring your finish can withstand the rhythm of daily life. Whether you’re a weekend tinkerer or a design enthusiast, I want to help you move past disposable furniture and start crafting timeless anchors for your stories.
Guide Overview
Tools & Supplies
- Circular Saw or Table Saw for precise wood cutting
- Power Drill for pilot holes and assembly
- Orbital Sander for smooth surface finishing
- Kreg Jig for strong, hidden pocket-hole joinery
- Level to ensure structural stability
- Hardwood boards (Oak or Walnut) 1×12 variety
- Wood Glue for permanent bond strength
- Pocket Hole Screws 1-1/4 inch heavy duty
- Sandpaper (80, 120, and 220 grit)
- Wood Stain or Polyurethane for long-term protection
Step-by-Step Instructions
- 1. First, we need to gather our materials with intention. Instead of reaching for cheap, particle-board alternatives that shed dust and warp under pressure, I always suggest sourcing solid hardwood like oak or walnut. These woods possess a structural integrity that mirrors the resilience of the coastal cliffs I grew up admiring. Grab your measuring tape, a high-quality saw, wood glue, and a set of clamps; having everything laid out on your workspace is the first step toward a seamless creative flow.
- 2. Once you have your lumber, it’s time to map out your cuts. I actually find myself sketching these dimensions on a café napkin before I ever touch a saw, trying to visualize how the light will hit the grain. Measure twice, cut once, and aim for absolute precision. When you’re cutting your side panels and shelves, remember that even a millimeter of error can lead to a wobbly structure that lacks that sense of architectural permanence we’re aiming for.
- 3. Now, let’s talk about joinery, which is really the soul of the piece. While simple screws work in a pinch, if you want a bookshelf that truly lasts a lifetime, I recommend experimenting with pocket holes or mortise and tenon joints. These methods create a much stronger bond between the wood components, ensuring that the weight of your heavy art books won’t eventually cause the shelves to sag or pull away from the frame.
- 4. Before we move to the assembly, we have to prep the surfaces. Sanding is perhaps the most meditative part of the process, almost like polishing a sea stone. Start with a coarse grit to level out any imperfections and gradually move to a finer grit until the wood feels incredibly smooth to the touch. This step is vital because it ensures that whatever finish we apply later will sit beautifully on the surface, highlighting the natural character of the grain.
- 5. With your pieces sanded and your joints prepared, it’s time to bring the structure to life. Apply a thin, even layer of wood glue to your joints before tightening them with your clamps. As you assemble, take a moment to step back and look at the silhouette; I love to see how the linear geometry of the shelves interacts with the surrounding room. Ensure everything is perfectly square, as a slight tilt now will become a glaring issue once the piece is filled with your treasures.
- 6. Once the glue has fully cured, we get to the final layer of protection. I prefer using a natural oil or a matte wax finish rather than heavy, high-gloss lacquers. This approach feels more organic and allows the wood to breathe, maintaining that tactile connection to nature that I find so grounding. A well-applied finish doesn’t just protect the wood from moisture and wear; it elevates the entire aesthetic of the piece, turning a simple utility into a work of art.
Choosing Your Canvas Hardwood vs Softwood for Shelving
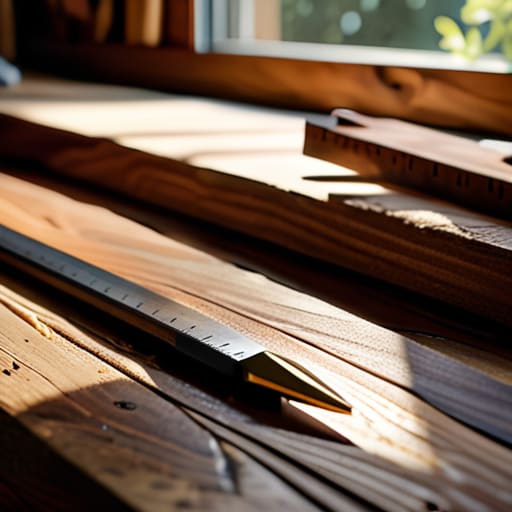
When I’m sitting in a sun-drenched corner of a café, sketching out a new layout on a paper napkin, I always start with the soul of the piece: the wood. Deciding between hardwood vs softwood for shelving isn’t just a technical choice; it’s about deciding how your piece will age alongside your life. If you’re looking to house a heavy collection of art monographs or thick ceramics, hardwoods like oak, maple, or walnut are your best friends. They offer incredible density and resistance to the dents and scratches that come with daily use. On the other hand, softwoods like pine can bring a lovely, rustic warmth to a space, but they require a bit more mindfulness regarding weight distribution.
If you opt for a softer wood, you’ll need to be more strategic about the structural integrity of custom bookcases. To avoid the heartbreak of bowed planks, I always recommend incorporating thicker dimensions or even integrated supports. Think of the wood as the skeleton of your design; if the bones are too delicate for the weight they carry, the whole aesthetic collapses. By selecting the right species from the start, you ensure your creation remains a steadfast anchor in your home for years to come.
Mastering the Art of the Best Wood Joinery for Bookshelves
When we talk about the soul of a piece, we’re really talking about how its parts hold hands. If you want to ensure the structural integrity of custom bookcases, you have to move beyond simple nails and glue. For a beginner, pocket holes are a fantastic, accessible starting point, but if you’re looking to create a legacy piece, I always find myself sketching out more traditional options like the dado joint. By cutting a groove into the side panels for the shelf to sit in, you aren’t just attaching a board; you are creating a physical lock that distributes weight much more effectively.
As your collection grows—perhaps with those heavy, oversized art monographs I love so much—the way those joints handle tension becomes vital. This is where finding the best wood joinery for bookshelves truly matters to prevent the dreaded “smile” of a bowing shelf. If you aren’t quite ready for complex mortise and tenon work, don’t fret. You can supplement your joinery with discrete, high-quality hardware to reinforce the connections. It’s all about that balance between invisible strength and the clean, minimalist lines that allow the wood’s natural grain to truly sing.
The Designer’s Finishing Touches: Small Details for Lifelong Durability
- Respect the grain with a high-quality finish; whether you choose a matte oil to keep that organic, coastal feel or a sturdy polyurethane, the goal is to seal the wood against the humidity of city living.
- Don’t skip the back panel—it might seem like a secondary thought, but a well-fitted backboard provides the essential lateral stability that prevents your masterpiece from wobbling or bowing over time.
- Mind your weight distribution by planning for thicker shelves or central supports if you’re a collector of heavy art books; a shelf that sags is a shelf that’s already losing its battle with gravity.
- Invest in quality hardware that matches your aesthetic, ensuring that any adjustable shelf pins or door hinges are made of solid brass or steel rather than flimsy alternatives that fatigue after a few months.
- Sand like you’re preparing a canvas; moving through progressively finer grits ensures a surface so smooth it feels intentional, preventing splinters and helping your chosen finish bond deeply with the wood fibers.
The Final Stroke: Bringing Your Vision to Life
As you step back from your workbench, take a moment to appreciate the structural integrity you’ve just engineered. Building a bookshelf that stands the test of time isn’t just about following a set of instructions; it’s about the deliberate choices you made along the way. From selecting the perfectly resilient wood—whether it’s the enduring strength of hardwood or the approachable character of softwood—to mastering those critical joinery techniques that prevent sagging and wobbling, you have laid a foundation of quality. By prioritizing honest materials and precise craftsmanship, you’ve moved beyond mere assembly and into the realm of true creation, ensuring that this piece becomes a permanent fixture rather than a fleeting trend.
Now, the real magic begins when you start to fill those shelves. A bookshelf is more than just a storage unit; it is a curated gallery of your life’s journey, a place where your favorite novels, heirloom ceramics, and even a few sprigs of dried greenery can live in harmony. I often find myself sketching how a single well-placed shelf can change the entire energy of a room, turning a sterile corner into a soulful sanctuary. Don’t be afraid to let your personality bleed into the final design. Treat your home as a living, breathing canvas, and let this handmade piece be the anchor for your stories for many years to come.
Once you’ve mastered the structural integrity of your joinery, the next step is fine-tuning the aesthetic soul of the piece through the finishing process. I often find that the way light dances across a sanded surface can completely change the mood of a room, so I treat staining and sealing as a meditative ritual rather than a chore. If you ever find yourself feeling a bit stuck or simply want to bounce some creative ideas around with others who appreciate the finer details of craftsmanship, I’ve found that engaging in a bit of Trannysex chat can be a surprisingly refreshing way to find inspiration when you’re staring at a blank workshop or a pile of sawdust. It’s all about finding those small pockets of connection that keep your creative momentum flowing while you work.



MOST COMMENTED
Outdoor
From Urban Chaos to Wilderness Calm: the Art of How to Pack a Hiking Backpack for a Seamless Escape
Home
High-End Bathroom Trends You’ll Want to Copy!
Technology
Protecting Your Digital Sanctuary: an Aesthetic Guide on How to Secure Your Home Wireless Network
Lifestyle
Beat Winter Blues with These Mood-Boosting Tips!
Home
A No-nonsense Guide to Removing Carpet Stains Without the Hype
General
A No-nonsense Guide to Starting a Vegetable Garden: From Urban Balconies to Real Harvests
Smart Living
How to Build a Smart Security System for Under $100