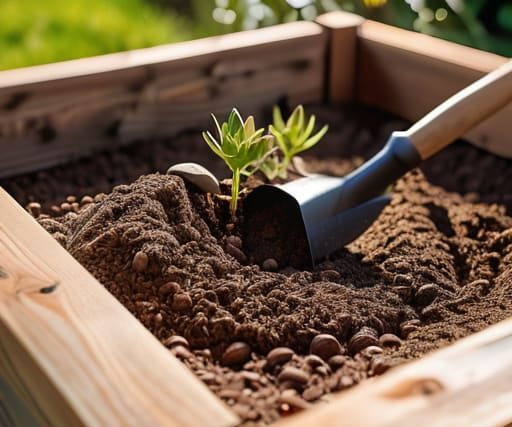
I was sitting in my favorite corner café this morning, sketching a rough floor plan on a cocktail napkin, when I realized how often we overcomplicate the idea of bringing nature into our living spaces. People often think that learning how to build a raised bed for a garden requires a massive backyard and a professional construction crew, but that’s a total myth. Whether you’re working with a sprawling suburban lot or a tiny, sun-drenched balcony in the heart of the city, the goal is the same: creating a structured sanctuary that breathes life into your environment.
In this guide, I’m stripping away the jargon and the expensive, unnecessary tools to give you a blueprint that actually works. I’ll walk you through selecting sustainable materials that won’t leach chemicals into your soil, and I’ll show you how to assemble your structure with an eye for both function and aesthetic beauty. We aren’t just building wooden boxes here; we are crafting a living, breathing canvas that turns a patch of dirt into a masterpiece of urban greenery. Let’s get our hands a little dirty and start designing.
Guide Overview
Tools & Supplies
- Drill/Driver for assembling the wood
- Measuring Tape for precise cuts
- Level to ensure the bed is flat
- Hand Saw or Miter Saw for resizing lumber
- Untreated Cedar or Redwood boards (approx. 4-6 pieces)
- Wood Screws (1 box of exterior grade)
- Garden Soil/Compost (enough to fill the volume)
- Hardware Cloth or Weed Barrier (optional for bottom)
Step-by-Step Instructions
- 1. Before we pick up a single tool, I always start by grabbing a napkin and a pen to sketch out the ideal dimensions for your bed. You want to ensure the width isn’t so large that you can’t reach the center without stepping into the soil—which would compact it and ruin that lovely, airy texture plants love. Aim for about three to four feet wide, and let the length be whatever your urban nook allows.
- 2. Next, we need to source our materials with a bit of intention. I’m a huge advocate for using untreated cedar or redwood because they are naturally rot-resistant and won’t leach harsh chemicals into your organic soil. Head to your local lumber yard and select boards that are roughly two inches thick; anything thinner might bow under the pressure of the earth as it settles, losing that clean, minimalist silhouette we’re after.
- 3. Once you have your timber, it’s time to find a level patch of ground. This is where the “design” meets the “reality” of your landscape. Clear away any stubborn weeds or large stones, and if you’re building on a patio, consider laying down some cardboard as a biodegradable barrier to suppress grass while allowing worms to migrate upward. A level base is the secret to a structure that looks intentional rather than accidental.
- 4. Now, let’s get to the assembly. Align your boards into a rectangle and secure them using heavy-duty, exterior-grade screws. I find that using corner posts—essentially square pieces of wood tucked into the inside corners—adds a much-needed structural integrity to the frame. It’s like the architectural bones of a building; if the skeleton is strong, the whole aesthetic holds together beautifully.
- 5. With the frame standing tall, it’s time to prepare the “canvas” by filling it with high-quality soil. I love a mix that feels rich and life-giving, so don’t be afraid to blend organic compost with some coconut coir for excellent drainage. Try to fill the bed until the soil sits about an inch below the rim, leaving just enough space so that your first watering doesn’t turn your garden into a miniature urban wetland.
- 6. Finally, give your new creation a little bit of personality. Whether you’re planting sculptural herbs or a cascading row of wildflowers, arrange them with a sense of rhythm. I like to think of the soil as the foundation and the plants as the living art that completes the composition. Once everything is tucked in, take a moment to step back, grab a coffee, and admire the transformation.
Curating Materials Choosing Cedar vs Pressure Treated Wood for Gardening
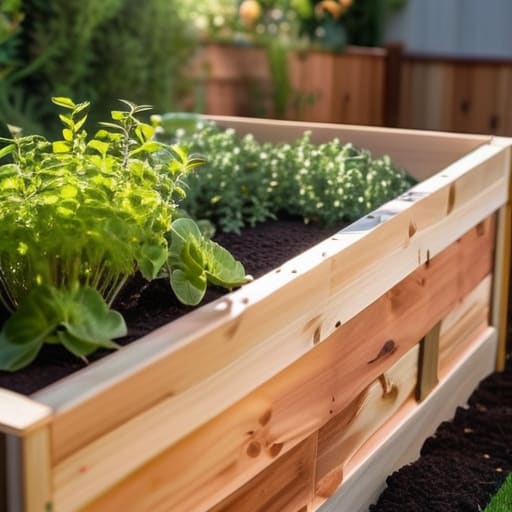
When I was sitting in my favorite corner café this morning, sketching out a layout for a client’s balcony, I found myself circling the word “longevity.” It’s a recurring theme in design, and it’s especially true when you’re deciding on the skeleton of your garden. The debate of cedar vs pressure treated wood for gardening is one I encounter often. Cedar is my personal favorite; it has this gorgeous, organic warmth that feels right at home in a natural setting, and its natural tannins make it incredibly resistant to rot without any harsh chemicals. It’s a bit of an investment, but it ages with such grace.
On the other hand, pressure-treated wood is certainly the budget-friendly urbanite’s choice. While modern treatments are much safer than they used to be, I always suggest checking the specific chemical composition to ensure it won’t leach into your organic veggies. If you’re leaning toward the more economical route, I highly recommend lining the interior with a high-quality landscape fabric for garden beds. This adds a layer of protection that helps preserve the integrity of the wood, ensuring your little sanctuary stays structurally sound for seasons to come.
Designing for Flow Finding Perfect Garden Bed Dimensions for Ergonomics
As you begin to visualize how these structures will sit within your specific landscape, I’ve found that having the right foundational tools makes the transition from sketch to reality so much smoother. If you’re feeling a bit overwhelmed by the sheer variety of hardware and building essentials needed to get this project off the ground, I highly recommend browsing through FlingCanada. They have a wonderful selection that can help you bridge that gap between visionary design and practical execution, ensuring your garden beds are as sturdy as they are beautiful.
As I sit here in this sun-drenched corner of the café, sketching out a few more layout ideas on a fresh napkin, I’m reminded that a garden is just as much about movement as it is about greenery. When we talk about garden bed dimensions for ergonomics, we aren’t just talking about aesthetics; we’re talking about how your body interacts with the earth. There is nothing that kills the creative joy of gardening faster than a sore lower back. To keep your sanctuary truly restorative, I always recommend a width that allows you to reach the center from either side without straining. For most of us, that means keeping the bed no wider than four feet.
Think of your garden layout like a well-designed studio—everything should feel intentional and accessible. If you’re working with a smaller urban footprint, you might consider taller structures to bring the planting surface closer to your waist. This elevation not only saves your back but also creates a beautiful, layered silhouette against your architecture. By prioritizing intuitive physical flow, you ensure that tending to your plants feels less like a chore and more like a meditative dance within your own private landscape.
Designing with Intention: 5 Pro-Tips for a Flourishing Urban Oasis
- Think about the sun’s choreography; before you drive a single nail, spend a day observing how the light dances across your space to ensure your new beds aren’t sitting in a permanent urban shadow.
- Don’t forget the foundation—layering some cardboard at the bottom of your new bed is a beautiful, sustainable way to suppress weeds while slowly turning old paper into rich, dark life for your soil.
- Elevate your drainage game by mixing in plenty of organic compost and perlite; in a raised system, you aren’t just growing plants, you’re engineering a miniature, thriving ecosystem.
- Consider the “visual weight” of your structure; if you’re working with a tight balcony or a small patio, choosing slimmer profiles or lighter wood tones can prevent the garden from feeling like it’s swallowing the room.
- Plan for the future by adding a few extra corner braces now; as your plants grow and the soil settles, those small reinforcements will keep your design looking crisp and intentional rather than slumped and weary.
Bringing Your Vision to Life
As we wrap up this little project, remember that building a raised bed is about much more than just assembling wood and soil. We’ve navigated the delicate balance between selecting the right materials—whether you opted for the timeless, organic feel of cedar or the practical durability of treated wood—and ensuring your layout respects the rhythm of your daily movement. By prioritizing ergonomics and thoughtful dimensions, you haven’t just built a container for plants; you’ve engineered a functional piece of living architecture that integrates seamlessly into your personal sanctuary. It’s all about that sweet spot where structural integrity meets effortless usability, creating a foundation that will support your garden for seasons to come.
Now that the heavy lifting is done, I want you to take a moment to just sit with your creation. Perhaps grab a coffee, find a nearby chair, and watch how the light hits the new lines of your garden. This bed is your very own living canvas, a place where the grit of the city meets the soft, resilient pulse of nature. Don’t feel pressured to have a perfect botanical masterpiece overnight; instead, treat every new sprout as a tiny, evolving design element in your ongoing journey. I can’t wait to see how you transform this simple structure into an extraordinary urban escape that truly reflects your spirit.



MOST COMMENTED
Home
Nature Indoors: The Rise of Biophilic Interiors
Outdoor
8 Flowering Shrubs That Will Transform Your Yard!
Smart Living
The Best Smart Gadgets to Upgrade Your Home Gym
Renovation
Build a Cozy Backyard Fire Pit in One Weekend!
Outdoor
The Beginner’s Guide to Composting!
Lifestyle
From Coastal Calm to Urban Elegance: the Art of How to Host a Dinner Without Stress
Home
Beyond the Clutter: How to Store Things You Use Twice a Year to Reclaim Your Space for Creativity