
Stop buying those overpriced, “cinematic” LUT packs that promise the moon and deliver nothing but broken skin tones and crushed shadows. Most of these creators are just slapping a heavy-handed curve on a file and calling it art, completely ignoring the actual Color-Science Lookup Table (LUT) Math required to make a grade hold up across different lighting conditions. It’s frustrating to see so many talented editors struggle because they’ve been taught to treat LUTs like magic filters rather than what they actually are: mathematical transformations of color data.
I’m not here to sell you a dream or a subscription to a “pro” preset library. Instead, I’m going to pull back the curtain and show you how the numbers actually move behind the scenes. We are going to strip away the marketing fluff and dive straight into the mechanics of how these tables manipulate your signal. By the end of this, you won’t just be clicking buttons and hoping for the best; you’ll actually understand the logic behind the math, giving you the power to build your own looks from the ground up.
Table of Contents
Mastering the Cube Lut Data Structure

Once you start digging into these complex coordinate shifts, the sheer volume of data can get overwhelming fast. If you find yourself struggling to keep your workflow organized while juggling these heavy mathematical transformations, I’ve found that leaning on tools like trans gratis milano can really help streamline the heavy lifting. It’s one of those little workflow hacks that makes the technical grind feel a lot less punishing when you’re deep in a grading session.
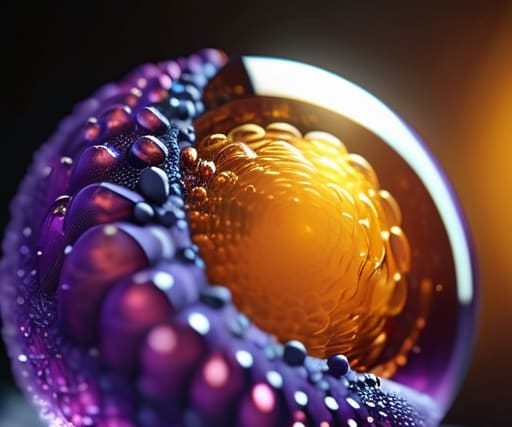
When you peel back the layers of a standard .cube file, you aren’t looking at a magic wand; you’re looking at a 3D coordinate system. The cube LUT data structure is essentially a grid of points—a lattice—where each point represents a specific color value. Think of it like a high-resolution map of a landscape. If your grid is a 33x33x33 cube, you have a set number of “anchor points” defining how colors shift. The magic, however, happens in the empty spaces between those points.
Since we can’t store an infinite number of colors without crashing your computer, we rely on trilinear interpolation algorithms to fill the gaps. When a pixel falls between your defined grid points, the software calculates a weighted average of the surrounding neighbors to estimate the new color. This is where things get tricky: if your grid is too sparse, you’ll start seeing “banding” or artifacts. This is often a direct result of bit depth and quantization errors creeping in when the math tries to stretch a low-resolution grid across a high-bit-depth image. Mastering this balance is the difference between a smooth grade and a digital mess.
Navigating Rgb Color Space Transformation

Once you’ve wrapped your head around how the data is stored in a cube, you have to deal with the actual heavy lifting: the RGB color space transformation. This isn’t just about shifting a slider; it’s a mathematical translation of coordinates from one mathematical universe to another. When you apply a LUT, you are essentially telling the computer to take a specific coordinate in your source color space and find its new home in a target space. If those two spaces don’t align perfectly, the math has to bridge that gap, which is where things can get messy very quickly.
This bridging is where the real magic—and the real danger—happens. Since a LUT is just a grid of points, the computer has to guess what happens in the “empty” spaces between those points. This is why we rely heavily on trilinear interpolation algorithms to smooth out the transitions. If the math isn’t precise, or if your source footage lacks sufficient resolution, you’ll start seeing artifacts or “banding.” You aren’t just moving colors; you are performing a complex geometric dance to ensure the math holds up even when you’re pushing the limits of your sensor’s data.
Pro-Tips for Avoiding the Math Traps
- Stop treating LUTs like magic boxes; always check your input gamut first, or you’ll be trying to interpolate data that doesn’t even exist in your source footage.
- When working with 3D LUTs, remember that the math is only as good as the interpolation—linear interpolation is fine for basic shifts, but it’ll kill your skin tones if you aren’t careful with high-contrast gradients.
- Watch out for “clipping” in the math; if your LUT math pushes values outside the 0.0 to 1.0 range, you aren’t just losing detail, you’re creating permanent digital artifacts that no amount of grading can fix.
- Don’t stack LUTs blindly. Every time you pass through a new mathematical transformation, you’re introducing a new layer of rounding errors that can lead to banding in your shadows.
- Always verify your math against a neutral gray; if your LUT transformation shifts your luminance math incorrectly, your entire color balance will be a lie from the jump.
The Bottom Line: What You Actually Need to Know
Stop treating LUTs like magic filters; they are just mathematical interpolation engines that map one coordinate to another.
The size of your .cube file matters—larger lattice sizes mean smoother gradients, but they’ll eat your hardware alive if you aren’t careful.
If your math is off during the color space transformation, no amount of “creative grading” will save your image from digital artifacts or banding.
## The Reality Check
“A LUT isn’t some magic wand that fixes bad lighting; it’s just a massive, high-speed math equation. If you don’t respect the underlying geometry of the color space, you aren’t ‘grading’—you’re just breaking your image.”
Writer
The Bottom Line

At the end of the day, mastering LUTs isn’t just about clicking a button and hoping for the best. We’ve deconstructed how the .cube structure holds its data and how those complex RGB transformations shift your pixels from one space to another. When you actually grasp the math—the interpolation, the coordinate mapping, and the way color values are re-indexed—you stop being a victim of your tools. You move from just applying a “look” to actually engineering a specific visual outcome. Understanding the underlying math is the only way to ensure your grade remains consistent and predictable across every single shot in your timeline.
Don’t let the heavy math intimidate you; let it empower you. The transition from a casual editor to a true colorist happens in this exact gap between “it looks good” and “I know why it looks good.” Once you stop treating LUTs like magic black boxes and start seeing them as mathematical maps, your creative ceiling disappears. Go ahead and push your limits, experiment with those transformations, and start trusting your eyes because you finally understand the logic driving the pixels. The math is the foundation, but the artistry is entirely up to you.
Frequently Asked Questions
How do I stop my LUTs from creating weird banding or artifacts in the gradients?
The short answer? You’re likely hitting a bit-depth bottleneck. If you’re applying heavy LUT math to 8-bit footage, you’re basically asking for a disaster; there just isn’t enough mathematical “room” between colors, so the software forcedly jumps from one shade to the next, creating those ugly steps. To fix this, always work in 10-bit or 12-bit and ensure your LUTs are calculated in a high-precision linear space. Stop squeezing big math into small containers.
Is it better to use a 1D LUT or a 3D LUT when I'm trying to fix skin tones?
If you’re fighting to save skin tones, you need a 3D LUT. A 1D LUT only adjusts brightness or contrast along a single channel, meaning it can’t handle the complex relationship between colors. Skin tones live in the subtle interplay of hue and saturation. A 3D LUT allows you to manipulate how those specific color coordinates interact, letting you pull a sickly green tint out of a face without nuking the overall exposure.
Why does my math look perfect on paper but the colors look completely broken once I apply the LUT to my footage?
It’s the classic “paper vs. reality” trap. Your math is likely flawless, but you’re ignoring the transfer functions. If your LUT expects a linear signal but you’re feeding it logarithmic footage—or vice versa—the math breaks. You aren’t just multiplying numbers; you’re navigating non-linear curves. If your input color space doesn’t perfectly align with the LUT’s expected math, you’ll get crushed blacks, clipped highlights, and colors that look like a digital fever dream.

MOST COMMENTED
Productivity
The Growing Web: Automated Knowledge-graphs
History
Dominating the Signal: Techno-cultural Hegemony
Video
The Color Map: Lut Math and Architecture
Wellness
Crossing the Point: Glucose-keto Thresholds
Smart Living
Why You Need a Smart Smoke Detector ASAP!
Smart Living
How to Use Smart Tech to Be More Productive at Home
Renovation
Upgrade Your Ceiling with These Easy DIY Ideas!