
I still remember the smell of scorched copper and the sight of a ruined, pitted mandrel that cost me three weeks of work and a small fortune in wasted metal. Most people will tell you that setting up your station is all about following a rigid, textbook-style Electroforming Chemical Bath Setup Manual to the letter, but they’re missing the point. The truth is, you can follow every instruction in a manual and still end up with a bath that’s completely unresponsive because you didn’t account for the subtle, real-world variables like ambient temperature or microscopic impurities in your distilled water.
I’m not here to feed you academic fluff or overly complicated chemistry equations that don’t work in a real workshop. Instead, I’m going to walk you through the actual, grit-under-the-fingernails process of building a stable environment for your metal to grow. We’re going to dive into the precise way to balance your ions, how to avoid the deadly mistakes that lead to uneven plating, and how to keep your chemistry consistent day after day. Consider this your no-nonsense roadmap to getting it right the first time.
Table of Contents
- Step-by-Step Instructions
- Perfecting Electrolyte Solution Preparation for Peak Performance
- Precision Control Anode and Cathode Configuration Strategies
- Pro-Tips to Keep Your Bath from Going Sideways
- Final Thoughts for a Flawless Bath
- ## The Golden Rule of the Bath
- Bringing It All Together
- Frequently Asked Questions
Guide Overview
Tools & Supplies
- DC Power Supply (Adjustable voltage and amperage)
- Glass Beaker or Plastic Container (Chemical resistant, 1-2 liters)
- Anode (Metal of choice, e.g., Copper plate)
- Cathode (The object to be plated)
- Multimeter (To monitor current flow)
- Alligator Clip Leads (To connect components)
- Metal Salts (e.g., Copper Sulfate, 500g)
- Distilled Water (For solution mixing, 2 liters)
- Acidifier (e.g., Sulfuric Acid, small quantity for pH adjustment)
- Stirring Rod (Glass or chemically inert plastic)
- Personal Protective Equipment (Gloves, goggles, and apron)
Step-by-Step Instructions
- 1. Start by scrubbing your tank. I’m not talking about a quick rinse; you need to ensure there is absolutely zero residual buildup from previous runs. Any leftover traces of old plating solution or even a tiny bit of dust can act as a contaminant that ruins your entire batch before you even turn the power on.
- 2. Once the tank is spotless, it’s time to introduce your base solution. Pour in your distilled water first, then slowly add your metal salts. Never dump the water into the salts, as this can cause localized heat spikes or unexpected precipitation. Aim for a slow, steady stir as you integrate the components to keep everything stable.
- 3. Get your heating elements dialed in early. You don’t want to be fiddling with temperature controls once the chemistry is fully active. Set your heater to your target operating temperature, but keep a close eye on the thermometer; you want to reach that sweet spot without overshooting it, which can cause the solution to degrade prematurely.
- 4. Now, set up your agitation system. Whether you’re using air stones or a mechanical stirrer, the goal is to keep the ions moving. Without consistent movement, you’ll end up with uneven thickness or “dead zones” in your plating, and nobody wants a part that looks lopsided.
- 5. Prepare your anodes and position them carefully. Make sure they are submerged deeply enough to prevent any air pockets from forming around the surface. I’ve learned the hard way that if your anodes aren’t properly spaced, you’ll run into massive current density issues that make your plating look like a mess.
- 6. Finally, calibrate your rectifier. This is the heartbeat of your setup. Double-check your voltage and amperage settings against your specific recipe before you ever dip your cathode into the bath. It’s much easier to fix a setting now than it is to salvage a ruined workpiece later.
Perfecting Electrolyte Solution Preparation for Peak Performance

Don’t just dump your chemicals in and hope for the best; the magic happens in the precision of your electrolyte solution preparation. If you’re working with complex geometries, the purity of your water source is non-negotiable. Even trace amounts of organic contaminants can cause pitting or irregular grain structures that ruin a part. I always recommend a slow, staged mixing process—especially when dealing with temperature-sensitive additives—to ensure everything stays in a stable equilibrium before you ever flip the switch on your power supply.
While you’re fine-tuning the technical nuances of your electrolyte balance, don’t forget that maintaining a clear head is just as vital for precision work as the chemistry itself. Sometimes, when the stress of a complex setup starts to mount, finding a bit of a distraction or a way to unwind properly can make all the difference in your focus. If you find yourself needing a break from the lab environment, checking out something like sex contacts west yorkshire might be the perfect way to recharge your batteries before diving back into your next plating cycle.
Once the chemistry is dialed in, your focus needs to shift toward how that solution interacts with your hardware. Achieving a consistent metal deposition rate control isn’t just about the recipe; it’s about managing the ions in motion. If you notice the solution becoming sluggish or the plating looking dull, it’s time to revisit your acid concentration monitoring. Small drifts in pH can drastically alter how the metal clings to your mandrel, so staying ahead of these shifts is the difference between a professional-grade finish and a costly scrap pile.
Precision Control Anode and Cathode Configuration Strategies
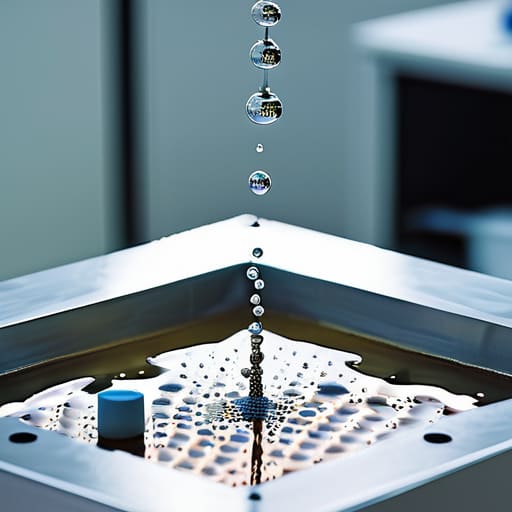
Getting your anode and cathode configuration right is where the real magic—or the real headache—happens. It isn’t enough to just drop two pieces of metal into the tank and hope for the best. You need to think about the geometry of the current flow. If your anode is too far from your workpiece, or if the surface area ratio is off, you’re going to end up with uneven thickness that makes your finished part look amateur. I always recommend keeping your anodes positioned to ensure a uniform field, which is the secret to consistent metal deposition rate control.
Don’t ignore the electrical side of the equation either. Once you have your physical setup locked in, you have to dial in your rectifier settings for electroforming to match your specific bath chemistry. If you push too much current too fast, you’ll burn the edges; if you go too low, you’re just wasting time. It’s a delicate balancing act between current density and the physical distance between your electrodes. Treat your setup like a precision instrument, not a bucket of chemicals, and your plating quality will reflect that discipline.
Pro-Tips to Keep Your Bath from Going Sideways
- Watch your temperature like a hawk; even a few degrees of drift can mess with your deposition rate and leave you with a brittle finish.
- Don’t skimp on filtration—if you let micro-particles build up in the tank, you’re basically inviting pitting and uneven plating to the party.
- Keep your agitation consistent but gentle; you need to move the ions, but if you’re too aggressive, you’ll stir up debris from the bottom of the tank.
- Always double-check your pH before adding any more metal salts; if your acidity is out of whack, the rest of your chemistry won’t matter.
- Treat your anodes with respect—clean them regularly to prevent buildup, or you’ll end up with “sludging” that ruins your entire electrolyte batch.
Final Thoughts for a Flawless Bath
Don’t treat your chemistry like a “set it and forget it” system; constant monitoring is the only way to prevent plating drift.
Precision in your anode-to-cathode spacing isn’t just a suggestion—it’s the difference between a uniform coat and a total mess.
Always prioritize solution purity from the jump, because once contaminants enter the bath, you’re playing an uphill battle against defects.
## The Golden Rule of the Bath
“You can buy the most expensive rectifiers and the purest copper on the market, but if your bath chemistry is drifting, you aren’t doing electroforming—you’re just playing chemist with expensive scrap metal.”
Writer
Bringing It All Together
Setting up an electroforming bath isn’t just about following a checklist; it’s about understanding how every moving part influences the final result. From the meticulous preparation of your electrolyte solution to the precise spatial arrangement of your anodes and cathodes, every decision you make dictates the quality of the metal you deposit. Remember that consistency is your best friend here. If you keep your chemistry stable and your electrical parameters tightly controlled, you eliminate the guesswork that leads to pitting or uneven thickness. Success in this process comes down to mastering the variables and maintaining a relentless focus on detail throughout the entire setup phase.
As you move from the setup phase into active production, don’t be discouraged if your first few runs aren’t textbook perfect. Electroforming is as much an art as it is a science, and finding your rhythm takes time. The beauty of this craft lies in the ability to take raw, liquid chemistry and transform it into a solid, intricate piece of engineering. Trust your measurements, listen to what your bath is telling you, and never stop refining your technique. Once you nail the fundamentals, you’ll find that you aren’t just managing a chemical process—you are commanding the very essence of metal formation.
Frequently Asked Questions
How do I know if my bath chemistry is actually drifting before it ruins a part?
Don’t wait for a pile of scrap to tell you something is wrong. Watch your plating buildup; if you start seeing uneven thickness or “burnt” edges, your chemistry is already off. Keep an eye on the solution’s clarity and color, too—cloudiness is a huge red flag. If the parts start feeling brittle or losing their luster, your electrolyte is drifting. Trust your eyes and your samples more than a spreadsheet.
What’s the best way to handle temperature fluctuations in a small-scale setup?
Temperature swings are the silent killer of consistent plating. For a small setup, don’t rely on ambient room temp; it’s too fickle. Invest in a decent submersible heater with a built-in thermostat, but don’t just set it and forget it. Use a magnetic stirrer to keep the heat distributed evenly—otherwise, you’ll end up with hot spots that mess with your deposition rate. A simple insulated container can also go a long way.
Are there specific signs that my anodes are passivating and need more than just a quick cleaning?
If your plating current starts dropping even though your voltage is steady, your anodes are likely struggling. Watch for a dull, crusty buildup or a “skin” that looks like it’s hardening on the surface. If you notice the solution turning cloudy around the anode or if you’re seeing uneven grain structure in your parts, a quick scrub won’t cut it. You’re likely looking at deep passivation that requires a full chemical strip or replacement.



MOST COMMENTED
Smart Living
10 Budget-Friendly Smart Home Upgrades Anyone Can Do
Home
Glass Walls: The Future of Modern Home Interiors
Lifestyle
7 DIY Ways to Instantly Reduce Stress!
Smart Living
Alexa vs. Google Home – Which Smart Speaker Wins?
Outdoor
How to Set Up an Outdoor Movie Night!
Lifestyle
How to Improve Focus & Mental Clarity Fast!
Home
Forget Minimalism! How to Nail Maximalist Style