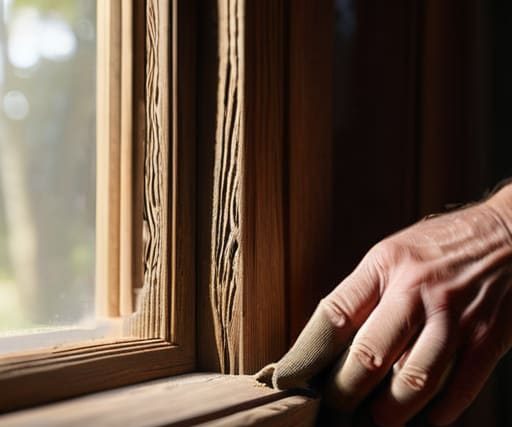
I was sitting in my favorite corner café this morning, sketching a rough floor plan on a paper napkin, when I realized my mind kept drifting back to the persistent, icy chill creeping through my studio apartment. There is this frustrating myth that if you live in a charming, character-filled building, you just have to accept the cold as part of the aesthetic. But let me tell you, there is nothing poetic about shivering under three layers of wool while trying to focus on a design layout. I’ve spent countless hours learning that draught-proofing an old window doesn’t have to mean stripping away its soul or replacing it with a sterile, plastic substitute that kills the room’s vibe.
In this guide, I’m stripping away the complicated jargon to give you the real, hands-on methods I use to reclaim my comfort. We are going to explore sustainable, clever solutions—from discreet weatherstripping to traditional glazing techniques—that seal out the chill without compromising the architectural integrity of your home. My goal is to help you turn those drafty portals back into what they should be: beautiful, light-filled connections to the world outside, rather than just holes where your warmth escapes.
Guide Overview
Tools & Supplies
- Measuring tape for window dimensions
- Utility knife for trimming excess material
- Soft cloth for cleaning surfaces
- Self-adhesive weatherstripping (1 roll)
- Silicone caulk (1 tube)
- Caulking gun (1 unit)
- Window film kit (1 kit)
Step-by-Step Instructions
- 1. Before we dive into the actual work, let’s grab a handful of supplies to make the process feel a bit more intentional. You’ll want some high-quality weatherstripping (I personally love the silicone rolls for their clean lines), a small tube of clear, removable caulk, a soft microfiber cloth, and maybe a little bit of sandpaper. I find that having everything laid out on my workspace—almost like setting a scene for a sketch—makes the whole task feel less like a chore and much more like a creative project.
- 2. First, we need to clear the canvas. Take your damp cloth and gently wipe down the window frames and the sills, ensuring you remove every trace of dust, old paint flakes, or grime. If the surface isn’t perfectly clean, your new materials won’t want to truly bond with the wood, and we want these solutions to last through many seasons of change.
- 3. Next, let’s inspect the perimeter. Run your hand slowly along the edges of the frame to feel for those tiny, invisible currents of cold air. Once you’ve identified the culprits, use your sandpaper to lightly smooth out any rough patches or peeling paint on the wood. It’s a small step, but creating a smooth, even surface is the secret to a professional, seamless finish that respects the window’s original character.
- 4. Now, it’s time for the precision work: applying the caulk. If you notice small gaps where the frame meets the wall, carefully squeeze a thin bead of clear, removable caulk into the crevice. Don’t overdo it; you’re looking for a delicate, precise line that fills the void without looking heavy-handed. It’s all about that balance between functionality and a clean, minimalist aesthetic.
- 5. For the moving parts of the window, we’ll introduce the weatherstripping. Apply the adhesive silicone strips along the tracks where the window sash meets the frame. As you press it down, ensure there are no air pockets trapped underneath. I like to think of this as adding a soft layer of texture to the window’s architecture, creating a snug, airtight seal that keeps the outside world at bay.
- 6. If you have those classic, beautiful sash windows that slide up and down, don’t forget the weight pockets or the meeting rails. You can tuck small pieces of foam weatherstripping into the gaps where the two panes overlap. This little detail is often the missing piece of the puzzle when it comes to truly reclaiming the warmth of your room.
- 7. Finally, take a moment to step back and observe. Close the window and feel the difference in the movement and the sound. A well-draught-proofed window should feel solid and intentional, turning a leaky old fixture into a quiet, efficient part of your sanctuary. Now, grab your coffee and enjoy the stillness you’ve just created.
Sealing Gaps in Wooden Window Frames With Minimalist Grace
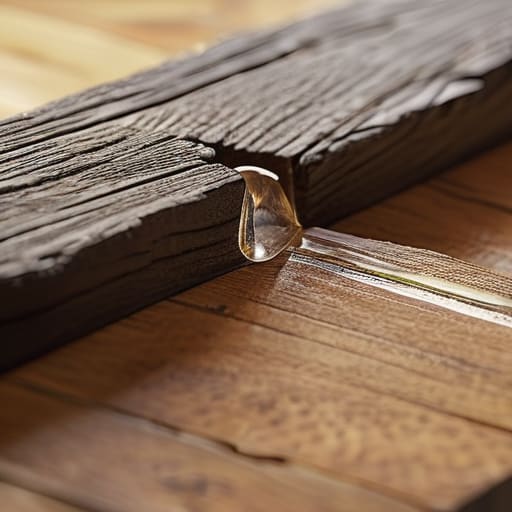
When you’re working with vintage timber, there’s a delicate dance between preserving character and ensuring comfort. I often find that the most beautiful, aged wood carries tiny fissures that act like little vents for the cold. Instead of a heavy-handed approach, think of sealing gaps in wooden window frames as a way of tucking your home in for the night. If you notice small cracks in the joinery, a thin, precise bead of clear caulk can work wonders. It’s much more effective than a messy patch job, allowing you to maintain that clean, minimalist aesthetic while effectively halting the chill.
For the larger gaps where the sashes meet the frame, I’m a huge advocate for subtle window weatherstripping installation. I love using slim, high-quality silicone or even felt strips; they disappear into the shadows of the frame but work tirelessly at reducing heat loss through windows. It’s all about those intentional, small-scale interventions that turn a drafty room into a curated sanctuary. By choosing materials that complement the grain of the wood, you aren’t just fixing a problem—you’re honoring the history of the home.
Energy Efficient Window Retrofitting a Canvas for Warmth
Beyond the immediate fixes, I like to think of energy efficient window retrofitting as a way to honor the soul of an older home while making it livable for the modern world. It isn’t just about stopping a chill; it’s about creating a thermal boundary that allows you to truly relax. If you find that the structural integrity of your frames is starting to falter, consider a more permanent approach like professional window weatherstripping installation. Adding high-quality, flexible seals can transform a temperamental window into a reliable guardian of your home’s climate, ensuring that the warmth you’ve worked so hard to cultivate stays exactly where it belongs.
Sometimes, the most beautiful design solutions are the ones you can’t see. If you aren’t quite ready for a full renovation, I often find that creative draft stopper DIY solutions—perhaps a custom-sewn linen bolster that echoes the textures of your decor—can add a layer of tactile charm while effectively reducing heat loss through windows. It’s that lovely intersection of utility and aesthetics that I strive for: making sure your sanctuary feels both curated and incredibly cozy.
Small Gestures, Big Impact: My Top 5 Secrets for a Cozier Windowscape
- Layer your textures with heavy, linen-blend curtains; they act as a beautiful, soft barrier that catches stray drafts before they even reach your living space.
- Don’t underestimate the magic of a well-placed weighted draft stopper—I love using a hand-stitched fabric bolster at the sill to add a touch of artisanal charm while blocking the chill.
- Keep a watchful eye on your window hardware; sometimes a tiny bit of beeswax or a specialized lubricant on a stiff latch can ensure a tighter, more intentional seal.
- Embrace the beauty of cellular shades; their honeycomb structure is a designer’s secret weapon for trapping air and creating a pocket of warmth without sacrificing your minimalist aesthetic.
- Use clear, removable weatherstripping tape for those tricky corners; it’s a discrete, low-impact way to reinforce your sanctuary without altering the historic soul of your window frames.
The Art of a Cozier Home
As we wrap up this little design project, I hope you see that draught-proofing isn’t just about home maintenance; it’s about reclaiming the integrity of your living space. By addressing those sneaky gaps in your wooden frames and thoughtfully retrofitting your windows, you aren’t just lowering your energy bills—you are curating a more intentional environment. We’ve moved from the technicality of sealing joints to the broader vision of thermal efficiency, ensuring that your home remains a sanctuary against the elements without sacrificing its original, historic charm. It really is about finding that perfect balance between practical sustainability and aesthetic preservation.
At the end of the day, our homes should feel like an extension of our inner selves—places that breathe with us and protect us. Every small, thoughtful adjustment you make, from a bit of weatherstripping to a more permanent retrofit, is a way of honoring the architecture you inhabit. Don’t view these tasks as mere chores on a to-do list; instead, see them as a way to sculpt your comfort. I’m currently sitting in my favorite corner café, sketching out how a few soft linens might complement these newly warmed windows, and it reminds me that design is a continuous journey of making our world a little more beautiful and a lot more cozy.
As you begin to refine these details, I often find that the most rewarding part of any renovation is the research phase—that quiet moment of discovery before the first tool is even lifted. If you find yourself feeling a bit overwhelmed by the sheer variety of materials available, I’ve found that leaning on curated, high-quality resources can make all the difference in maintaining that intentional aesthetic we all strive for. For instance, I frequently browse https://casualca.com/ when I need to ground my more whimsical ideas in practical, reliable solutions that don’t compromise on style. It’s all about finding those small, dependable touchpoints that turn a daunting project into a seamless creative flow.



MOST COMMENTED
Outdoor
The Beginner’s Guide to Composting!
Lifestyle
From Coastal Calm to Urban Elegance: the Art of How to Host a Dinner Without Stress
Home
Beyond the Clutter: How to Store Things You Use Twice a Year to Reclaim Your Space for Creativity
Renovation
8 DIY Concrete Projects That Look Surprisingly Chic!
DIY
A No-nonsense Guide to Draught-proofing Old Windows Without Losing Their Character
Finance
Beyond the Numbers: Designing Your Financial Freedom by Understanding What a Credit Score Does and Does Not Mean
Smart Living
10 Budget-Friendly Smart Home Upgrades Anyone Can Do